[Jest] Globals API 소개
![[Jest] Globals API 소개](/assets/img/post/jest/index.png)
Jest 의 Globals Api 를 살펴보고 학습해본다.
1.개요
Jest에서는 테스트 파일에서 사용되는 메서드와 객체를 전역 환경에 배치합니다. 이번 글에서는 이런 메서드에는 무엇이 있는지 알아보고 사용하는 방법들을 간단히 알아보겠습니다.
이 전역 객체들은 사용하기위해서 아무것도 import 시키거나 가져올 필요가 없습니다. 그렇지만 명시적으로 다음과 같이 가져올 수도 있습니다.
import {describe, expect, test} from '@jest/globals'
2.Jest Global Method 종류
Jest의 공식 사이트 에서는 global 메서드의 종류가 크게 4가지 형태로 나누어져 있는것을 볼 수 있습니다.
after , before , describe , test 이렇게 4가지의 형태로 나눌 수 있을 것 같은데
목차는 다음과 같습니다.
- afterAll(fn, timeout)
- afterEach(fn, timeout)
- beforeAll(fn, timeout)
- beforeEach(fn, timeout)
- describe(name, fn)
- describe.each(table)(name, fn, timeout)
- describe.only(name, fn)
- describe.only.each(table)(name, fn)
- describe.skip(name, fn)
- describe.skip.each(table)(name, fn)
- test(name, fn, timeout)
- test.concurrent(name, fn, timeout)
- test.concurrent.each(table)(name, fn, timeout)
- test.concurrent.only.each(table)(name, fn)
- test.concurrent.skip.each(table)(name, fn)
- test.each(table)(name, fn, timeout)
- test.only(name, fn, timeout)
- test.only.each(table)(name, fn)
- test.skip(name, fn)
- test.skip.each(table)(name, fn)
- test.todo(name)
링크 : Jest 공식 site
3.test
3-1.test(name, fn, timeout)
Unit Test 에서 test할 때 사용 하는 메소드 입니다.
별칭으로 it(name, fn, timeout) 이러한 형태로도 사용됩니다. 한번 사용해 볼까요?
// file: "test01.spec.js"

//기본 0을 입력받아서 0인지 확인
test('0 is 0', () => {
  expect(0).toBe(0);
});

//별칭사용하고 0을 입력받아서 0인지 확인
it('0 is 0', () => {
  expect(0).toBe(0);
});
위의 파일을 테스트 하면 아래의 결과가 나타납니다.
3-2.test.concurrent(name, fn, timeout)
테스트를 순차적으로 진행하지 않고 동시에 진행하는 메서드 입니다.
별칭으로 it.concurrent(name, fn, timeout) 형태로 사용 가능합니다.
// file: "test02.spec.js"
test.concurrent('addition of 2 numbers', async () => {
  expect(5 + 3).toBe(8);
});

test.concurrent('subtraction 2 numbers', async () => {
  expect(5 - 3).toBe(2);
});
3-3.test.concurrent.each(table)(name, fn, timeout)
별칭으로 test 대신 it 을 사용할 수 있습니다.
test.concurrent.each 다른 데이터로 동일한 테스트를 계속 반복 복제하는 경우 사용됩니다. test.each테스트를 한 번 작성하고 데이터를 전달할 수 있습니다. 테스트는 모두 비동기식으로 실행됩니다.
test.concurrent.each 사용하는 방법은 두가지가 있습니다.
test.concurrent.each(table)(name, fn, timeout)
내용을 각각 살펴 보면 다음과 같습니다.
- table : 함수에 사용될 인수가 있는 배열 입니다.
- name : test 의 이름 입니다.
printf형식 을 지정 하여 매개 변수를 위치에 삽입하여 고유 한 테스트 제목을 생성합니다 . - fn : 실행할 테스트 함수 , table 의 내용을 수신하는 함수이며 비동기 함수여야 합니다.
// file: "test03.spec.js"
test.concurrent.each([
  [1, 1, 2],
  [1, 2, 3],
  [2, 1, 3],
])('.add(%i, %i)', async (a, b, expected) => {
  expect(a + b).toBe(expected);
});
위의 코드 실행 결과는 다음과 같습니다.
- test.concurrent.each`table`(name, fn, timeout)
가장 큰차이점인 table 에 대해서 살펴보겠습니다.- table : Tagged Template Literal
첫번째 행은 ‘|‘로 구분된 변수 명 입니다. 두번째 행부터는 템플릿 리터널의 변수 구문을 사용하여 Data를 넘깁니다.
- table : Tagged Template Literal
// file: "test04.spec.js"
test.concurrent.each`
  a    | b    | expected
  ${1} | ${1} | ${2}
  ${1} | ${2} | ${3}
  ${2} | ${1} | ${3}
`('returns $expected when $a is added $b', async ({a, b, expected}) => {
  expect(a + b).toBe(expected);
});
위의 코드 실행 결과는 다음과 같습니다.
3-4.test.concurrent.only.each(table)(name, fn)
test.concurrent.only.each 함수는 test.concurrent.each 와 같은 목적을 가지는 함수지만 test 안의 오직 이 함수만 실행되고 나머지는 스킵됩니다.
// file: "test04.spec.js"
test.concurrent.only.each([
  [1, 1, 2],
  [1, 2, 3],
  [2, 1, 3],
])('.add(%i, %i)', async (a, b, expected) => {
  expect(a + b).toBe(expected);
});

test('will not be ran', () => {
  expect(1 / 0).toBe(Infinity);
});
위의 결과를 볼때 skipped 된 것을 보실 수 있습니다.
3-5.test.concurrent.skip.each(table)(name, fn)
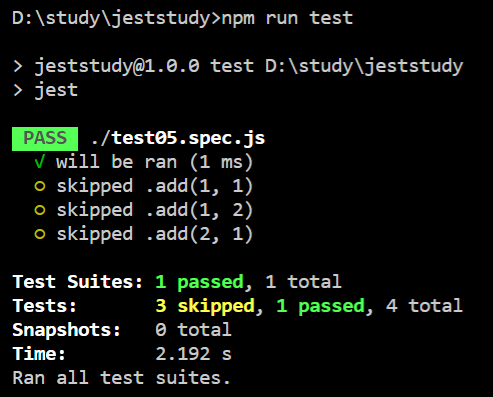
비동기 데이터 기반 테스트 모음실행을 중지하려는 경우 사용 합니다.
// file: "test05.spec.js"
test.concurrent.skip.each([
  [1, 1, 2],
  [1, 2, 3],
  [2, 1, 3],
])('.add(%i, %i)', async (a, b, expected) => {
  expect(a + b).toBe(expected); // will not be ran
});

test('will be ran', () => {
  expect(1 / 0).toBe(Infinity);
});
3-6. test 일반 함수 처리
위의 내용중 concurrent 이 붙은 부분만 빼면 동일하게 사용할 수 있습니다. 각각 data를 받아서 처리할 수 도 있고 스킵을 시킬수있으며 오직 그함수만 실행시킬 수 도 있습니다.
- test.each(table)(name, fn, timeout)
- test.only(name, fn, timeout)
- test.only.each(table)(name, fn)
- test.skip(name, fn)
- test.skip.each(table)(name, fn)
목차는 위와 같으며 자세한 사용법은 중복 설명인 것 같아 생략합니다.
3-7. test.todo(name)
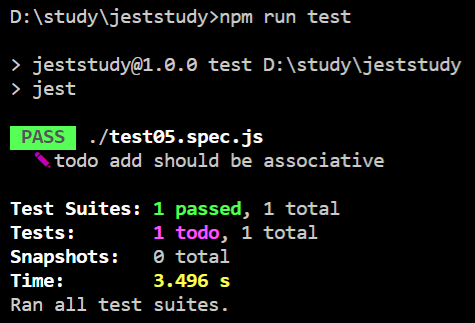
테스트 작성을 계획할때 들어가야할 자리에 미리 레이아웃을 그려놓는 기능이라고 생각 하지면 됩니다. 마지막 결과 터미널에서 강조 표시되므로 쉽게 다음에 작성할 코드를 살펴 볼 수 있습니다.
const add = (a, b) => a + b;

test.todo('add should be associative');
4.describe
관련 테스트를 그룹화하는 블록을 만듭니다.
4-1. describe(name, fn)
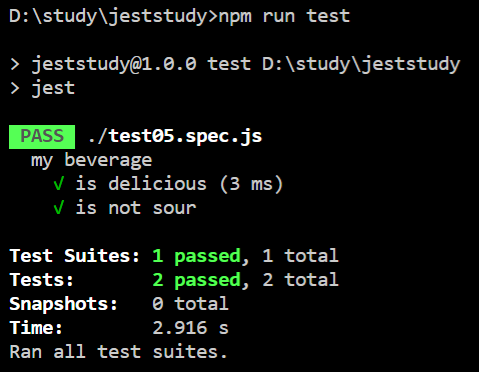
여러개의 테스트를 그룹화합니다.
const myBeverage = {
  delicious: true,
  sour: false,
};

describe('my beverage', () => {
  test('is delicious', () => {
    expect(myBeverage.delicious).toBeTruthy();
  });

  test('is not sour', () => {
    expect(myBeverage.sour).toBeFalsy();
  });
});
4-2. describe 그밖의 API
- describe.each(table)(name, fn, timeout)
- describe.only(name, fn)
- describe.only.each(table)(name, fn)
- describe.skip(name, fn)
- describe.skip.each(table)(name, fn)
5. after
5-1. afterAll(fn, timeout)
테스트 후에 동일 레벨 또는 하위 레벨의 테스트가 실행 될 때 딱 한번만 실행됩니다.
주로 테스트가 끝난 후 자원을 해제 할 때 한번 실행되는것 DB 커넥션 을 끊거나 메모리에 할당된 이벤트를 반환할때 사용된다.
5-2 afterEach(fn, timeout)
테스트 단위마다 끝날 때 실행
5. before
5-1. beforeAll(fn, timeout)
- 파일의 테스트가 실행되기 전에 함수를 실행합니다.
- 함수가 Promise 또는 Generator를 반환하는 함수인 경우 , Jest는 계속 테스트를 진행하기 전에 promise가 해결될 때까지 기다립니다.
- 모든 테스트에서 사용될 전역 상태를 설정할 때 유용합니다.
5-2 beforeEach(fn, timeout)
- 파일의 각 테스트가 실행되기 전에 함수를 실행합니다.
6.정리
Jest 의 globals 의 종류와 간단한 사용법에 대해 알아보았는데요 이걸 어디에다 사용하나 의문이 들 수도 있습니다. 하지만 테스트를 사용하다 보면 임시로 이 테스트만 돌려보고 싶을때나 이 테스트는 스킵을 하고 싶을 때 이러한 것들을 알고 있으면 쉽게 이러한 상황에서 빠르게 테스트를 진행 할 수 있습니다.


